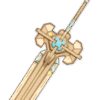
Favonius Greatsword
Favonius Greatsword
ATK - 454
Energy Recharge - 61.3%


Element
AnemoRarity
4 star character
Type
Claymore
Tier
C tierSayu is a 4★ Anemo Claymore character mostly used as a healer with some swirl utility. Her Skill lets her roll around (like the Sonic) and deal Anemo damage, while her Burst heals the team and keeps applying swirl. She’s fun and comfy to use, but her overall damage is low and her healing isn’t as strong as more modern supports.
| Team role: | Support |
|---|---|
| Birthday: | October 19th |
| Constellation: | Nyctereutes Minor |
| Released in: | 2.0 |

Favonius Greatsword
Favonius Greatsword
ATK - 454
Energy Recharge - 61.3%
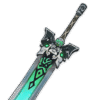
Wolf’s Gravestone
Wolf’s Gravestone
ATK - 608
ATK - 49.6%
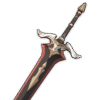
Katsuragikiri Nagamasa
Katsuragikiri Nagamasa
ATK - 510
Energy Recharge - 45.9%
Skyward Pride
Skyward Pride
ATK - 674
Energy Recharge - 36.8%
Increases all DMG by 8% (10%, 12%, 14%, 16%). After using an Elemental Burst, a vacuum blade that does 80% (100%, 120%, 140%, 160%) of ATK as DMG to opponents along its path will be created when Normal or Charged Attacks hit. Lasts for 20s or 8 vacuum blades.
Sacrificial Greatsword
Sacrificial Greatsword
ATK - 565
Energy Recharge - 30.6%
After dealing damage to an opponent with an Elemental Skill, the skill has a 40% (50%, 60%, 70%, 80%) chance to end its own CD. Can only occur once every 30% (26%, 22%, 19%, 16%)s.
Makhaira Aquamarine
Makhaira Aquamarine
ATK - 510
Elemental Mastery - 165
The following effect will trigger every 10s: The equipping character will gain 24% (30%, 36%, 42%, 48%) of their Elemental Mastery as bonus ATK for 12s, with nearby party members gaining 30% of this buff for the same duration. Multiple instances of this weapon can allow this buff to stack. This effect will still trigger even if the character is not on the field.
Ultimate Overlord’s Mega Magic Sword
Ultimate Overlord’s Mega Magic Sword
ATK - 565
Energy Recharge - 30.6%
ATK increased by 12% (15%, 18%, 21%, 24%). That’s not all! The support from all Melusines you’ve helped in Merusea Village fills you with strength! Based on the number of them you’ve helped, your ATK is increased by up to an additional 12% (15%, 18%, 21%, 24%).
Rainslasher
Rainslasher
ATK - 510
Elemental Mastery - 165
Bloodtainted Greatsword
Bloodtainted Greatsword
ATK - 354
Elemental Mastery - 187
Increases DMG against opponents affected by Pyro or Electro by 12% (15%, 18%, 21%, 24%).

Viridescent Venerer
Artifact set
2-piece Bonus
Anemo DMG Bonus +15%
4-piece Bonus
Increases Swirl DMG by 60%. Decreases opponent’s Elemental RES to the element infused in the Swirl by 40% for 10s.

Maiden Beloved
Artifact set
2-piece Bonus
Character Healing Effectiveness +15%
4-piece Bonus
Using an Elemental Skill or Burst increases healing received by all party members by 20% for 10s.

Emblem of Severed Fate
Artifact set
2-piece Bonus
Energy Recharge +20%
4-piece Bonus
Increases Elemental Burst DMG by 25% of Energy Recharge. A maximum of 75% bonus DMG can be obtained in this way.
Maiden Beloved
Artifact set
2-piece Bonus
Character Healing Effectiveness +15%
4-piece Bonus
Using an Elemental Skill or Burst increases healing received by all party members by 20% for 10s.


Sayu’s healing and off-field Anemo application make her a very flexible and useful support for many different teams. Because the Swirl reaction can only be triggered by Pyro, Hydro, Electro, and Cryo characters, it’s highly recommended to pair her with units from those elements. When building a team, you can think of her as a more budget-friendly alternative to Kazuha or Sucrose.
Nagadus Emerald Gemstone
Character Ascension Materials
Crystal Marrow
Local Specialty (Inazuma)
Energy Nectar
Character and Weapon Enhancement Materials
How to obtain?
Marionette Core
Character Level-Up Materials
Guide to Light
Character Talent Materials
How to obtain?

Gilded Scale
Character Level-Up Materials
| Phase | Req. Lvl | Mora | Gemstone | Specialty | Enemy Drop | Boss Drop |
|---|---|---|---|---|---|---|
| 1 | 20 | 20,000 |

Nagadus Emerald Sliver Character Ascension Materials How to obtain?
|
Crystal Marrow Local Specialty (Inazuma) |
Whopperflower Nectar Character and Weapon Enhancement Materials |
- |
| 2 | 40 | 40,000 |
Nagadus Emerald Fragment Character Ascension Materials How to obtain?
|
Crystal Marrow Local Specialty (Inazuma) |
Whopperflower Nectar Character and Weapon Enhancement Materials |
Marionette Core Character Level-Up Materials |
| 3 | 50 | 60,000 |
Nagadus Emerald Fragment Character Ascension Materials How to obtain?
|
Crystal Marrow Local Specialty (Inazuma) |
Shimmering Nectar Character and Weapon Enhancement Materials How to obtain?
|
Marionette Core Character Level-Up Materials |
| 4 | 60 | 80,000 |
Nagadus Emerald Chunk Character Ascension Materials How to obtain?
|
Crystal Marrow Local Specialty (Inazuma) |
Shimmering Nectar Character and Weapon Enhancement Materials How to obtain?
|
Marionette Core Character Level-Up Materials |
| 5 | 70 | 100,000 |
Nagadus Emerald Chunk Character Ascension Materials How to obtain?
|
Crystal Marrow Local Specialty (Inazuma) |
Energy Nectar Character and Weapon Enhancement Materials How to obtain?
|
Marionette Core Character Level-Up Materials |
| 6 | 80 | 120,000 |
Nagadus Emerald Gemstone Character Ascension Materials |
Crystal Marrow Local Specialty (Inazuma) |
Energy Nectar Character and Weapon Enhancement Materials How to obtain?
|
Marionette Core Character Level-Up Materials |
| Level | Mora | Talent Book | Common Drop | Weekly Boss Drop | Crown of Insight |
|---|---|---|---|---|---|
| 1 → 2 | 12,500 |
Teachings of Light Character Talent Materials How to obtain?
|
Whopperflower Nectar Character and Weapon Enhancement Materials |
- | - |
| 2 → 3 | 17,500 |
Guide to Light Character Talent Materials How to obtain?
|
Shimmering Nectar Character and Weapon Enhancement Materials How to obtain?
|
- | - |
| 3 → 4 | 25,000 |
Guide to Light Character Talent Materials How to obtain?
|
Shimmering Nectar Character and Weapon Enhancement Materials How to obtain?
|
- | - |
| 4 → 5 | 30,000 |
Guide to Light Character Talent Materials How to obtain?
|
Shimmering Nectar Character and Weapon Enhancement Materials How to obtain?
|
- | - |
| 5 → 6 | 37,500 |
Guide to Light Character Talent Materials How to obtain?
|
Shimmering Nectar Character and Weapon Enhancement Materials How to obtain?
|
- | - |
| 6 → 7 | 120,000 |
Philosophies of Light Character Talent Materials |
Energy Nectar Character and Weapon Enhancement Materials How to obtain?
|
Marionette Core Character Level-Up Materials |
- |
| 7 → 8 | 260,000 |
Philosophies of Light Character Talent Materials |
Energy Nectar Character and Weapon Enhancement Materials How to obtain?
|
Marionette Core Character Level-Up Materials |
- |
| 8 → 9 | 450,000 |
Philosophies of Light Character Talent Materials |
Energy Nectar Character and Weapon Enhancement Materials How to obtain?
|
Marionette Core Character Level-Up Materials |
- |
| 9 → 10 | 700,000 |
Philosophies of Light Character Talent Materials |
Energy Nectar Character and Weapon Enhancement Materials How to obtain?
|
Marionette Core Character Level-Up Materials |

Crown of Insight Character Talent Materials |


Shuumatsuban Ninja Blade
Normal Attack
Performs up to 4 consecutive strikes.
Charged Attack
Drains Stamina over time to perform continuous spinning attacks against all nearby opponents.
At the end of the sequence, performs a more powerful slash.
Plunging Attack
Plunges from mid-air to strike the ground below, damaging opponents along the path and dealing AoE DMG upon impact.
| 1-Hit DMG (%) | 72.24 |
| 2-Hit DMG (%) | 71.38 |
| 3-Hit DMG (%) | 43.43+43.43 |
| 4-Hit DMG (%) | 98.13 |
| Charged Attack Spinning DMG (%) | 62.55 |
| Charged Attack Final DMG (%) | 113.09 |
| Charged Attack Stamina Cost | 40/s |
| Max Duration | 5s |
| Plunge DMG (%) | 74.59 |
| Low Plunge DMG (%) | 149.14 |
| High Plunge DMG (%) | 186.29 |
| 1-Hit DMG (%) | 78.12 |
| 2-Hit DMG (%) | 77.19 |
| 3-Hit DMG (%) | 46.97+46.97 |
| 4-Hit DMG (%) | 106.11 |
| Charged Attack Spinning DMG (%) | 67.64 |
| Charged Attack Final DMG (%) | 122.3 |
| Charged Attack Stamina Cost | 40/s |
| Max Duration | 5s |
| Plunge DMG (%) | 80.66 |
| Low Plunge DMG (%) | 161.28 |
| High Plunge DMG (%) | 201.45 |
| 1-Hit DMG (%) | 84 |
| 2-Hit DMG (%) | 83 |
| 3-Hit DMG (%) | 50.5+50.5 |
| 4-Hit DMG (%) | 114.1 |
| Charged Attack Spinning DMG (%) | 72.73 |
| Charged Attack Final DMG (%) | 131.5 |
| Charged Attack Stamina Cost | 40/s |
| Max Duration | 5s |
| Plunge DMG (%) | 86.73 |
| Low Plunge DMG (%) | 173.42 |
| High Plunge DMG (%) | 216.62 |
| 1-Hit DMG (%) | 92.4 |
| 2-Hit DMG (%) | 91.3 |
| 3-Hit DMG (%) | 55.55+55.55 |
| 4-Hit DMG (%) | 125.51 |
| Charged Attack Spinning DMG (%) | 80 |
| Charged Attack Final DMG (%) | 144.65 |
| Charged Attack Stamina Cost | 40/s |
| Max Duration | 5s |
| Plunge DMG (%) | 95.4 |
| Low Plunge DMG (%) | 190.77 |
| High Plunge DMG (%) | 238.28 |
| 1-Hit DMG (%) | 98.28 |
| 2-Hit DMG (%) | 97.11 |
| 3-Hit DMG (%) | 59.09+59.09 |
| 4-Hit DMG (%) | 133.5 |
| Charged Attack Spinning DMG (%) | 85.09 |
| Charged Attack Final DMG (%) | 153.86 |
| Charged Attack Stamina Cost | 40/s |
| Max Duration | 5s |
| Plunge DMG (%) | 101.47 |
| Low Plunge DMG (%) | 202.91 |
| High Plunge DMG (%) | 253.44 |
| 1-Hit DMG (%) | 105 |
| 2-Hit DMG (%) | 103.75 |
| 3-Hit DMG (%) | 63.13+63.13 |
| 4-Hit DMG (%) | 142.63 |
| Charged Attack Spinning DMG (%) | 90.91 |
| Charged Attack Final DMG (%) | 164.38 |
| Charged Attack Stamina Cost | 40/s |
| Max Duration | 5s |
| Plunge DMG (%) | 108.41 |
| Low Plunge DMG (%) | 216.78 |
| High Plunge DMG (%) | 270.77 |
| 1-Hit DMG (%) | 114.24 |
| 2-Hit DMG (%) | 112.88 |
| 3-Hit DMG (%) | 68.68+68.68 |
| 4-Hit DMG (%) | 155.18 |
| Charged Attack Spinning DMG (%) | 98.91 |
| Charged Attack Final DMG (%) | 178.84 |
| Charged Attack Stamina Cost | 40/s |
| Max Duration | 5s |
| Plunge DMG (%) | 117.95 |
| Low Plunge DMG (%) | 235.86 |
| High Plunge DMG (%) | 294.6 |
| 1-Hit DMG (%) | 123.48 |
| 2-Hit DMG (%) | 122.01 |
| 3-Hit DMG (%) | 74.23+74.23 |
| 4-Hit DMG (%) | 167.73 |
| Charged Attack Spinning DMG (%) | 106.91 |
| Charged Attack Final DMG (%) | 193.31 |
| Charged Attack Stamina Cost | 40/s |
| Max Duration | 5s |
| Plunge DMG (%) | 127.49 |
| Low Plunge DMG (%) | 254.93 |
| High Plunge DMG (%) | 318.42 |
| 1-Hit DMG (%) | 132.72 |
| 2-Hit DMG (%) | 131.14 |
| 3-Hit DMG (%) | 79.79+79.79 |
| 4-Hit DMG (%) | 180.28 |
| Charged Attack Spinning DMG (%) | 114.91 |
| Charged Attack Final DMG (%) | 207.77 |
| Charged Attack Stamina Cost | 40/s |
| Max Duration | 5s |
| Plunge DMG (%) | 137.03 |
| Low Plunge DMG (%) | 274.01 |
| High Plunge DMG (%) | 342.25 |
| 1-Hit DMG (%) | 142.8 |
| 2-Hit DMG (%) | 141.1 |
| 3-Hit DMG (%) | 85.85+85.85 |
| 4-Hit DMG (%) | 193.97 |
| Charged Attack Spinning DMG (%) | 123.64 |
| Charged Attack Final DMG (%) | 223.55 |
| Charged Attack Stamina Cost | 40/s |
| Max Duration | 5s |
| Plunge DMG (%) | 147.44 |
| Low Plunge DMG (%) | 294.82 |
| High Plunge DMG (%) | 368.25 |
| 1-Hit DMG (%) | 154.35 |
| 2-Hit DMG (%) | 152.51 |
| 3-Hit DMG (%) | 92.79+92.79 |
| 4-Hit DMG (%) | 209.66 |
| Charged Attack Spinning DMG (%) | 133.64 |
| Charged Attack Final DMG (%) | 241.63 |
| Charged Attack Stamina Cost | 40/s |
| Max Duration | 5s |
| Plunge DMG (%) | 157.85 |
| Low Plunge DMG (%) | 315.63 |
| High Plunge DMG (%) | 394.24 |
Yoohoo Art: Fuuin Dash
The special technique of the Yoohoo Ninja Arts!
Sayu curls up into a rolling Fuufuu Windwheel and smashes into opponents at high speed, dealing Anemo DMG. When the duration ends, she unleashes a Fuufuu Whirlwind Kick, dealing AoE Anemo DMG.
(Press/Tap)
Enters the Fuufuu Windwheel state, rolling forward a short distance before using the Fuufuu Whirlwind Kick.
Hold
Rolls about continuously in the Fuufuu Windwheel state, increasing Sayu’s resistance to interruption while within that state.
During this time, Sayu can control the direction of her roll, and can use the skill again to end her Windwheel state early and unleash a stronger version of the Fuufuu Whirlwind Kick.
The Hold version of this skill can trigger Elemental Absorption.
This skill has a maximum duration of 10s and enters CD once its effects end.
The longer Sayu remains in her Windwheel state, the longer the CD.
Elemental Absorption
If Sayu comes into contact with Hydro/Pyro/Cryo/Electro while in her Windwheel state, she will deal additional elemental DMG of that type.
Elemental Absorption may only occur once per use of this skill.
| Fuufuu Windwheel DMG (%) | 36.0 |
| Fuufuu Whirlwind Kick Press DMG (%) | 158.4 |
| Fuufuu Whirlwind Kick Hold DMG (%) | 217.6 |
| Fuufuu Windwheel Elemental DMG (%) | 16.8 |
| Fuufuu Whirlwind Kick Elemental DMG (%) | 76.2 |
| Duration | 10s |
| CD | 6-11s |
| Fuufuu Windwheel DMG (%) | 38.7 |
| Fuufuu Whirlwind Kick Press DMG (%) | 170.3 |
| Fuufuu Whirlwind Kick Hold DMG (%) | 233.9 |
| Fuufuu Windwheel Elemental DMG (%) | 18.1 |
| Fuufuu Whirlwind Kick Elemental DMG (%) | 81.9 |
| Duration | 10s |
| CD | 6-11s |
| Fuufuu Windwheel DMG (%) | 41.4 |
| Fuufuu Whirlwind Kick Press DMG (%) | 182.2 |
| Fuufuu Whirlwind Kick Hold DMG (%) | 250.2 |
| Fuufuu Windwheel Elemental DMG (%) | 19.3 |
| Fuufuu Whirlwind Kick Elemental DMG (%) | 87.6 |
| Duration | 10s |
| CD | 6-11s |
| Fuufuu Windwheel DMG (%) | 45 |
| Fuufuu Whirlwind Kick Press DMG (%) | 198 |
| Fuufuu Whirlwind Kick Hold DMG (%) | 272 |
| Fuufuu Windwheel Elemental DMG (%) | 21 |
| Fuufuu Whirlwind Kick Elemental DMG (%) | 95.2 |
| Duration | 10s |
| CD | 6-11s |
| Fuufuu Windwheel DMG (%) | 47.7 |
| Fuufuu Whirlwind Kick Press DMG (%) | 209.88 |
| Fuufuu Whirlwind Kick Hold DMG (%) | 288.32 |
| Fuufuu Windwheel Elemental DMG (%) | 22.26 |
| Fuufuu Whirlwind Kick Elemental DMG (%) | 100.91 |
| Duration | 10s |
| CD | 6-11s |
| Fuufuu Windwheel DMG (%) | 50.4 |
| Fuufuu Whirlwind Kick Press DMG (%) | 221.76 |
| Fuufuu Whirlwind Kick Hold DMG (%) | 304.64 |
| Fuufuu Windwheel Elemental DMG (%) | 23.52 |
| Fuufuu Whirlwind Kick Elemental DMG (%) | 106.62 |
| Duration | 10s |
| CD | 6-11s |
| Fuufuu Windwheel DMG (%) | 54 |
| Fuufuu Whirlwind Kick Press DMG (%) | 237.6 |
| Fuufuu Whirlwind Kick Hold DMG (%) | 326.4 |
| Fuufuu Windwheel Elemental DMG (%) | 25.2 |
| Fuufuu Whirlwind Kick Elemental DMG (%) | 114.24 |
| Duration | 10s |
| CD | 6-11s |
| Fuufuu Windwheel DMG (%) | 57.6 |
| Fuufuu Whirlwind Kick Press DMG (%) | 253.44 |
| Fuufuu Whirlwind Kick Hold DMG (%) | 348.16 |
| Fuufuu Windwheel Elemental DMG (%) | 26.88 |
| Fuufuu Whirlwind Kick Elemental DMG (%) | 121.86 |
| Duration | 10s |
| CD | 6-11s |
| Fuufuu Windwheel DMG (%) | 61.2 |
| Fuufuu Whirlwind Kick Press DMG (%) | 269.28 |
| Fuufuu Whirlwind Kick Hold DMG (%) | 369.92 |
| Fuufuu Windwheel Elemental DMG (%) | 28.56 |
| Fuufuu Whirlwind Kick Elemental DMG (%) | 129.47 |
| Duration | 10s |
| CD | 6-11s |
| Fuufuu Windwheel DMG (%) | 64.8 |
| Fuufuu Whirlwind Kick Press DMG (%) | 285.12 |
| Fuufuu Whirlwind Kick Hold DMG (%) | 391.68 |
| Fuufuu Windwheel Elemental DMG (%) | 30.24 |
| Fuufuu Whirlwind Kick Elemental DMG (%) | 137.09 |
| Duration | 10s |
| CD | 6-11s |
| Fuufuu Windwheel DMG (%) | 68.4 |
| Fuufuu Whirlwind Kick Press DMG (%) | 300.96 |
| Fuufuu Whirlwind Kick Hold DMG (%) | 413.44 |
| Fuufuu Windwheel Elemental DMG (%) | 31.92 |
| Fuufuu Whirlwind Kick Elemental DMG (%) | 144.7 |
| Duration | 10s |
| CD | 6-11s |
| Fuufuu Windwheel DMG (%) | 72 |
| Fuufuu Whirlwind Kick Press DMG (%) | 316.8 |
| Fuufuu Whirlwind Kick Hold DMG (%) | 435.2 |
| Fuufuu Windwheel Elemental DMG (%) | 33.6 |
| Fuufuu Whirlwind Kick Elemental DMG (%) | 152.32 |
| Duration | 10s |
| CD | 6-11s |
| Fuufuu Windwheel DMG (%) | 76.5 |
| Fuufuu Whirlwind Kick Press DMG (%) | 336.6 |
| Fuufuu Whirlwind Kick Hold DMG (%) | 462.4 |
| Fuufuu Windwheel Elemental DMG (%) | 35.7 |
| Fuufuu Whirlwind Kick Elemental DMG (%) | 161.84 |
| Duration | 10s |
| CD | 6-11s |
Yoohoo Art: Mujina Flurry
The other super special technique of the Yoohoo Ninja Arts! It summons a pair of helping hands for Sayu.
Deals Anemo DMG to nearby opponents and heals all nearby party members. The amount of HP restored is based on Sayu’s ATK. This skill then summons a Muji-Muji Daruma.
Muji-Muji Daruma
At specific intervals, the Daruma will take one of several actions based on the situation around it:
| Skill Activation DMG (%) | 117 |
| Skill Activation Healing | 92.2% ATK+577 |
| Muji-Muji Daruma DMG (%) | 52 |
| Muji-Muji Daruma Healing | 79.9% ATK+500 |
| Duration | 12s |
| CD | 20s |
| Energy Cost | 80 |
| Skill Activation DMG (%) | 126 |
| Skill Activation Healing | 99.1% ATK+635 |
| Muji-Muji Daruma DMG (%) | 56 |
| Muji-Muji Daruma Healing | 85.9% ATK+550 |
| Duration | 12s |
| CD | 20s |
| Energy Cost | 80 |
| Skill Activation DMG (%) | 134 |
| Skill Activation Healing | 106.0% ATK+698 |
| Muji-Muji Daruma DMG (%) | 60 |
| Muji-Muji Daruma Healing | 91.9% ATK+605 |
| Duration | 12s |
| CD | 20s |
| Energy Cost | 80 |
| Skill Activation DMG (%) | 146 |
| Skill Activation Healing | 115.2% ATK+765 |
| Muji-Muji Daruma DMG (%) | 65 |
| Muji-Muji Daruma Healing | 99.8% ATK+663 |
| Duration | 12s |
| CD | 20s |
| Energy Cost | 80 |
| Skill Activation DMG (%) | 154.76 |
| Skill Activation Healing | 122.11% ATK+837.2 |
| Muji-Muji Daruma DMG (%) | 68.9 |
| Muji-Muji Daruma Healing | 105.83% ATK+725 |
| Duration | 12s |
| CD | 20s |
| Energy Cost | 80 |
| Skill Activation DMG (%) | 163.52 |
| Skill Activation Healing | 129.02% ATK+914.2 |
| Muji-Muji Daruma DMG (%) | 72.8 |
| Muji-Muji Daruma Healing | 111.82% ATK+792 |
| Duration | 12s |
| CD | 20s |
| Energy Cost | 80 |
| Skill Activation DMG (%) | 175.2 |
| Skill Activation Healing | 138.24% ATK+996 |
| Muji-Muji Daruma DMG (%) | 78 |
| Muji-Muji Daruma Healing | 119.81% ATK+863 |
| Duration | 12s |
| CD | 20s |
| Energy Cost | 80 |
| Skill Activation DMG (%) | 186.88 |
| Skill Activation Healing | 147.46% ATK+1,082 |
| Muji-Muji Daruma DMG (%) | 83.2 |
| Muji-Muji Daruma Healing | 127.8% ATK+938 |
| Duration | 12s |
| CD | 20s |
| Energy Cost | 80 |
| Skill Activation DMG (%) | 198.56 |
| Skill Activation Healing | 156.67% ATK+1,174 |
| Muji-Muji Daruma DMG (%) | 88.4 |
| Muji-Muji Daruma Healing | 135.78% ATK+1,017 |
| Duration | 12s |
| CD | 20s |
| Energy Cost | 80 |
| Skill Activation DMG (%) | 210.24 |
| Skill Activation Healing | 165.89% ATK+1,270 |
| Muji-Muji Daruma DMG (%) | 93.6 |
| Muji-Muji Daruma Healing | 143.77% ATK+1,100 |
| Duration | 12s |
| CD | 20s |
| Energy Cost | 80 |
| Skill Activation DMG (%) | 221.92 |
| Skill Activation Healing | 175.1% ATK+1,371 |
| Muji-Muji Daruma DMG (%) | 98.8 |
| Muji-Muji Daruma Healing | 151.76% ATK+1,188 |
| Duration | 12s |
| CD | 20s |
| Energy Cost | 80 |
| Skill Activation DMG (%) | 233.6 |
| Skill Activation Healing | 184.32% ATK+1,477 |
| Muji-Muji Daruma DMG (%) | 104 |
| Muji-Muji Daruma Healing | 159.74% ATK+1,280 |
| Duration | 12s |
| CD | 20s |
| Energy Cost | 80 |
| Skill Activation DMG (%) | 248.2 |
| Skill Activation Healing | 195.84% ATK+1,587 |
| Muji-Muji Daruma DMG (%) | 110.5 |
| Muji-Muji Daruma Healing | 169.73% ATK+1,376 |
| Duration | 12s |
| CD | 20s |
| Energy Cost | 80 |

Someone More Capable
When Sayu triggers a Swirl reaction while active, she heals all your characters and nearby allies for 300 HP. She will also heal an additional 1.2 HP for every point of Elemental Mastery she has.
This effect can be triggered once every 2s.

No Work Today!
The Muji-Muji Daruma created by Yoohoo Art: Mujina Flurry gains the following effects:

Yoohoo Art: Silencer's Secret
When Sayu is in the party, your characters will not startle Crystalflies and certain other animals when getting near them.
Check the “Other” sub-category of the “Living Beings / Wildlife” section in the Archive for creatures this skill works on.

Constellation lvl 1
Multi-Task no Jutsu
The Muji-Muji Daruma created by Yoohoo Art: Mujina Flurry will ignore HP limits and can simultaneously attack nearby opponents and heal characters.

Constellation lvl 2
Egress Prep
Yoohoo Art: Fuuin Dash gains the following effects:

Constellation lvl 3
Eh, the Bunshin Can Handle It
Increases the Level of Yoohoo Art: Mujina Flurry by 3.
Maximum upgrade level is 15.

Constellation lvl 4
Skiving: New and Improved
Sayu recovers 1.2 Energy when she triggers a Swirl reaction.
This effect occurs once every 2s.

Constellation lvl 5
Speed Comes First
Increases the Level of Yoohoo Art: Fuuin Dash by 3.
Maximum upgrade level is 15.

Constellation lvl 6
Sleep O'Clock
The Muji-Muji Daruma created by Sayu’s Yoohoo Art: Mujina Flurry will now also benefit from her Elemental Mastery. Each point of Sayu’s Elemental Mastery will produce the following effects: